Howdy, Stranger!
We are about to switch to a new forum software. Until then we have removed the registration on this forum.
-
How ro record audio?
I am trying to use the minim library to record a mp3 that is manipulated with a motion sensor. However, the recordings I am making are coming up empty. Here is my code:
import processing.serial.*; import cc.arduino.*; import org.firmata.*; import processing.sound.*; import ddf.minim.*; import ddf.minim.ugens.*; Arduino ardy; SoundFile quick; int senVal; Minim minim; AudioOutput out; AudioRecorder recorder; void setup() { fullScreen(P3D); noCursor(); background(0); //Getting Arduino Data println(Arduino.list()); ardy = new Arduino(this, "COM3", 57600); ardy.pinMode(0, Arduino.INPUT); //sound quick = new SoundFile(this, "QUICKENING.mp3"); quick.loop(); //record sound minim = new Minim(this); out = minim.getLineOut(); recorder = minim.createRecorder(out, "quickening_live.wav"); frameRate(25); } void draw() { //Sensor Data senVal = ardy.analogRead(0); println(senVal); quick.rate(map(senVal, 70, 10, 1, 0.25)); } void keyReleased(){ if ( key == 'r' ) { if ( recorder.isRecording() ) { recorder.endRecord(); } else { recorder.beginRecord(); } } if ( key == 's' ){ recorder.save(); println("Done saving."); } }Move a servo motor (Ax-12) with arduino, processing and kinectps you do not need the
    import cc.arduino.*;

    Arduino arduino;
library since you do not use the firmata protocol. You just send an angle via serial and arduino "caches" that value
I can't connect my Perfume Dispenser to my music Visualizer . I am using an Arduino Uno.import cc.arduino.*; //import org.firmata.*; import ddf.minim.*; import ddf.minim.analysis.*; import processing.serial.*; Minim minim; AudioPlayer song; FFT fft; BeatDetect beat; BeatListener bl; //Serial myPort; // Create object from Serial class Arduino arduino; // Variables that define the "zones" of the spectrum // For example, for bass, we take only the first 4% of the total spectrum float specLow = 0.03; // 3% float specMid = 0.125; // 12.5% float specHi = 0.20; // 20% float specLLow = 0.009; // This leaves 64% of the possible spectrum that will not be used. //These values are usually too high for the human ear anyway. //Scoring values for each zone. float scoreLow = 0; float scoreMid = 0; float scoreHi = 0; // Previous value, to soften the reduction float oldScoreLow = scoreLow; float oldScoreMid = scoreMid; float oldScoreHi = scoreHi; // Softening value float scoreDecreaseRate = 25; // Cubes appearing in space int nbCubes; Cube[] cubes; //Lines that appear on the sides int nbMurs = 500; Mur[] murs; boolean isPlaying = false; //Arduino int ledPin = 11; // LED connected to digital pin 11 float kickSize; int deltime = 15; //Time to make the relay on after a beat is detected boolean delayboolean = false; void setup() { //Display in 3D on the entire screen fullScreen(P3D); //Load the minim library minim = new Minim(this); arduino = new Arduino(this, Arduino.list()[0], 57600); Arduino.list(); //Load song song = minim.loadFile("song.mp3"); //Create the FFT object to analyze the song fft = new FFT(song.bufferSize(), song.sampleRate()); //One cube per frequency band nbCubes = (int)(fft.specSize()*specHi); cubes = new Cube[nbCubes]; println(nbCubes); //As many walls as we want murs = new Mur[nbMurs]; println(nbMurs); //Create all objects //Create cubic objects for (int i = 0; i < nbCubes; i++) { cubes[i] = new Cube(); } //Create wall objects //Left walls for (int i = 0; i < nbMurs; i+=4) { murs[i] = new Mur(0, height/2, 10, height); } //Straight walls for (int i = 1; i < nbMurs; i+=4) { murs[i] = new Mur(width, height/2, 10, height); } //Low walls for (int i = 2; i < nbMurs; i+=4) { murs[i] = new Mur(width/2, height, width, 10); } //High walls for (int i = 3; i < nbMurs; i+=4) { murs[i] = new Mur(width/2, 0, width, 10); } //Black background background(0); //Start the song song.play(0); // a beat detection object that is FREQ_ENERGY mode that // expects buffers the length of song's buffer size // and samples captured at songs's sample rate beat = new BeatDetect(song.bufferSize(), song.sampleRate()); // set the sensitivity to 300 milliseconds // After a beat has been detected, the algorithm will wait for 300 milliseconds // before allowing another beat to be reported. You can use this to dampen the // algorithm if it is giving too many false-positives. The default value is 10, // which is essentially no damping. If you try to set the sensitivity to a negative value, // an error will be reported and it will be set to 10 instead. beat.setSensitivity(100); kickSize= 16; // make a new beat listener, so that we won't miss any buffers for the analysis bl = new BeatListener(beat, song); textFont(createFont("Helvetica", 16)); textAlign(CENTER); arduino.pinMode(ledPin, Arduino.OUTPUT); } void draw() { //Forward the song. One draw () for each "frame" of the song ... fft.forward(song.mix); //Calculation of "scores" (power) for three categories of sound //First, save old values oldScoreLow = scoreLow; oldScoreMid = scoreMid; oldScoreHi = scoreHi; //Reset values scoreLow = 0; scoreMid = 0; scoreHi = 0; //Calculate the new "scores" for(int i = 0; i < fft.specSize()*specLow; i++) { scoreLow += fft.getBand(i); } for(int i = (int)(fft.specSize()*specLow); i < fft.specSize()*specMid; i++) { scoreMid += fft.getBand(i); } for(int i = (int)(fft.specSize()*specMid); i < fft.specSize()*specHi; i++) { scoreHi += fft.getBand(i); } //To slow down the descent. if (oldScoreLow > scoreLow) { scoreLow = oldScoreLow - scoreDecreaseRate; } if (oldScoreMid > scoreMid) { scoreMid = oldScoreMid - scoreDecreaseRate; } if (oldScoreHi > scoreHi) { scoreHi = oldScoreHi - scoreDecreaseRate; } //Volume for all frequencies at this time, with the highest sounds higher. //This allows the animation to go faster for more high-pitched sounds, which we would notice more. float scoreGlobal = 0.66*scoreLow + 0.8*scoreMid + 1*scoreHi; //subtle color background background(scoreLow/100, scoreMid/100, scoreHi/100); //Cube for each frequency band for(int i = 0; i < nbCubes; i++) { //Value of the frequency band float bandValue = fft.getBand(i); //println(bandValue); //The color is represented as: red for bass, green for medium sounds and blue for high. //The opacity is determined by the volume of the tape and the overall volume. cubes[i].display(scoreLow, scoreMid, scoreHi, bandValue, scoreGlobal); } //Walls lines, here we must keep the value of the previous tape and the next to connect them together float previousBandValue = fft.getBand(0); //Distance between each line point, negative because on the z dimension float dist = -25; //Multiply the height by this constant float heightMult = 2; //For each band for(int i = 1; i < fft.specSize(); i++) { //Value of the frequency band, we multiply the bands farther to make them more visible. float bandValue = fft.getBand(i)*(1 + (i/50)); //Selection of the color according to the strengths of the different types of sounds. stroke(100+scoreLow, 100+scoreMid, 100+scoreHi, 255-i); strokeWeight(1 + (scoreGlobal/100)); //lower left line line(0, height-(previousBandValue*heightMult), dist*(i-1), 0, height-(bandValue*heightMult), dist*i); line((previousBandValue*heightMult), height, dist*(i-1), (bandValue*heightMult), height, dist*i); line(0, height-(previousBandValue*heightMult), dist*(i-1), (bandValue*heightMult), height, dist*i); //upper left line line(0, (previousBandValue*heightMult), dist*(i-1), 0, (bandValue*heightMult), dist*i); line((previousBandValue*heightMult), 0, dist*(i-1), (bandValue*heightMult), 0, dist*i); line(0, (previousBandValue*heightMult), dist*(i-1), (bandValue*heightMult), 0, dist*i); //lower right line line(width, height-(previousBandValue*heightMult), dist*(i-1), width, height-(bandValue*heightMult), dist*i); line(width-(previousBandValue*heightMult), height, dist*(i-1), width-(bandValue*heightMult), height, dist*i); line(width, height-(previousBandValue*heightMult), dist*(i-1), width-(bandValue*heightMult), height, dist*i); //upper right line line(width, (previousBandValue*heightMult), dist*(i-1), width, (bandValue*heightMult), dist*i); line(width-(previousBandValue*heightMult), 0, dist*(i-1), width-(bandValue*heightMult), 0, dist*i); line(width, (previousBandValue*heightMult), dist*(i-1), width-(bandValue*heightMult), 0, dist*i); //Save the value for the next loop round previousBandValue = bandValue; } //Rectangular walls for(int i = 0; i < nbMurs; i++) { //Each wall is assigned a band, and its strength is sent to it. float intensity = fft.getBand(i%((int)(fft.specSize()*specHi))); murs[i].display(scoreLow, scoreMid, scoreHi, intensity, scoreGlobal); } } //Class for cubes floating in space. class Cube { //Z position of "spawn" and maximum Z position float startingZ = -10000; float maxZ = 1000; //Position values float x, y, z; float rotX, rotY, rotZ; float sumRotX, sumRotY, sumRotZ; //Contructor Cube() { //Make the cube appear in a random place x = random(0, width); y = random(0, height); z = random(startingZ, maxZ); //Give the cube a random rotation rotX = random(0, 1); rotY = random(0, 1); rotZ = random(0, 1); } void display(float scoreLow, float scoreMid, float scoreHi, float intensity, float scoreGlobal) { //Selection of the color, opacity determined by the intensity (volume of the band) color displayColor = color(scoreLow*0.67, scoreMid*0.67, scoreHi*0.67, intensity*5); fill(displayColor, 255); //Color lines, they disappear with the individual intensity of the cube color strokeColor = color(255, 150-(20*intensity)); stroke(strokeColor); strokeWeight(1 + (scoreGlobal/300)); //Creating a transformation matrix to perform rotations, enlargements pushMatrix(); //Displacement translate(x, y, z); //Calculation of the rotation according to the intensity for the cube sumRotX += intensity*(rotX/1000); sumRotY += intensity*(rotY/1000); sumRotZ += intensity*(rotZ/1000); //Application of the rotation rotateX(sumRotX); rotateY(sumRotY); rotateZ(sumRotY); //Creation of the box, variable size according to the intensity for the cube box(100+(intensity/2)); //Application of the matrix popMatrix(); //Dislacement Z z+= (1+(intensity/5)+(pow((scoreGlobal/150), 2))); //Replace the box at the back when it is no longer visible if (z >= maxZ) { x = random(0, width); y = random(0, height); z = startingZ; } } } //Class to display the lines on the sides class Mur { //Minimum and maximum position Z float startingZ = -10000; float maxZ = 50; //Values at the position float x, y, z; float sizeX, sizeY; //Constructor Mur(float x, float y, float sizeX, float sizeY) { //Make the line appear at the specified place this.x = x; this.y = y; //random depth this.z = random(startingZ, maxZ); //We determine the size because the walls on the floors have a different size than those on the sides this.sizeX = sizeX; this.sizeY = sizeY; } //Display function void display(float scoreLow, float scoreMid, float scoreHi, float intensity, float scoreGlobal) { //Color determined by low, medium and high sounds //Opacity determined by the overall volume color displayColor = color(scoreLow*0.67, scoreMid*0.67, scoreHi*0.67, scoreGlobal); //Make lines disappear in the distance to give an illusion of fog fill(displayColor, ((scoreGlobal-5)/1000)*(255+(z/25))); noStroke(); //First band, the one that moves according to the force //Transformation Matrix pushMatrix(); //Displacement translate(x, y, z); //extension if (intensity > 100) intensity = 100; scale(sizeX*(intensity/100), sizeY*(intensity/100), 20); //Creation of the "box" box(1); popMatrix(); //Second band, the one that is still the same size displayColor = color(scoreLow*0.5, scoreMid*0.5, scoreHi*0.5, scoreGlobal); fill(displayColor, (scoreGlobal/5000)*(255+(z/25))); //Transformation Matrix pushMatrix(); //Displacement translate(x, y, z); //Extension scale(sizeX, sizeY, 10); //Creation of the "box" box(1); popMatrix(); //Displacemnt Z z+= (pow((scoreGlobal/150), 2)); if (z >= maxZ) { z = startingZ; if(beat.isKick()) { arduino.digitalWrite(ledPin, Arduino.HIGH); // set the LED on kickSize = 32; delayboolean = true; //Tells a later if statement to delay for long enough for the lights to light up } arduino.digitalWrite(ledPin, Arduino.LOW); // set the LED off textSize(kickSize); text("KICK", width/4, height/2); kickSize = constrain(kickSize * 0.95, 16, 32); // if (bandValue == 0.01) //{ //if we clicked in the window //myPort.write('1'); //send a 1 //println("1"); // } else //{ //otherwise //myPort.write('0'); //send a 0 //} //try{ //Load band values // ArrayList = (ArrayList) fft.getBand(); //float bandValue = fft.getBand(); //get first band value // println(bandValue); // Ascertain if the top band value is new (i.e. it's new) or if it's the same, has the count changed (i.e. it's the same value again). // Update band value details. //Arduino - standard LED blinky action. //arduino.digitalWrite(ledPin, Arduino.HIGH); //delay(100); //arduino.digitalWrite(ledPin, Arduino.LOW); //} // Slow everything down so you don't exceed perfume dispenser's rate limits. Check every 10 secs. // delay(10000); //} } } } void mousePressed() { // if the song is already being played // we pause it and change the value of isPlaying variable if (isPlaying) { song.pause(); isPlaying = false; } // and if it is paused we play it and change 'isPlaying' accordingly // :P pretty simple right? else { song.play(); isPlaying = true; }} void stop() { // always close Minim audio classes when you are finished with them song.close(); // always stop Minim before exiting minim.stop(); // this closes the sketch super.stop(); } void keyPressed() { if ( key == 'p' ) song.play(); // Press P to play the song. if ( key == 's' ) song.pause(); // Press S to pause playing. if ( key == 'h' ) song.rewind(); // Press H to reset to the start. if ( key == 'f' ) song.skip(500); // Press F to fast forward. if ( key == 'r' ) song.skip(-500); // Press R to rewind. if ( key == 'q' ) song.close(); // Press Q to quit playing. }Change a gradient screen using sensors + arduino + raspberry piFor gradients: https://processing.org/reference/lerpColor_.html
You seem to be wanting to use the sensors with an Arduino. In this case you can just prototype the sensor-reading with any laptop (or PC), and just replace your laptop (or PC) by the Raspberry Pi when your sketch works sufficiently.
You will be using Processing's Serial library (or Firmata) to be reading in the measured sensor readings into Processing. This library works the same way regardless of which platform it is running - just the name of the serial port will change when you move to a Raspberry Pi (which is running Linux).
Good luck.
SOLVED //Save data from serial Arduino to txt using ProcessingHey guys,
I'm working on a program that saves data from my potentiometer to a txt file. The idea is that I have my potentiometer on analog A0 and every second the value of the analog port has to be saved in Processing in a file. After a minute, the data has to be saved in another file. So I actually have to build something that saves 60 values per minute. And added to that, the data in the file has to have the actual time behind it.
For Arduino I have to use Firmata.
My processing code for now :
import processing.serial.*;
import cc.arduino.*;          //this is all double, but I don't know which to use
Arduino arduino;
Serial pot;

void setup() {
//println(Serial.list());
//pot = new Serial(this, Serial.list()[0], 9600);    //should I use Serial or Arduino?


println(Arduino.list());
arduino = new Arduino(this, Arduino.list()[0], 57600);
PrintWriter output;
output = createWriter("data.txt");
output.println(arduino.analogRead(0));  //in the file it only prints 0
output.flush();
output.close();
}

void draw() {}
Yes, I know this code is far from finished. That's why I have come here, for your help. I put some things in the code, I hope you can answer those questions. And I need some help with creating a new file after 1 minute.
Arduino NANO and Firmata - Analog Pin NumbersI need many sensor values for visualization in Processing and it would take many efforts to read the values via Serial. As far as I can seen I would have to analyze substrings and it would be much more comfortable to handle this via Firmata as own objects in Processing. The corresponding .ino-code works fine with the pure numbers as pin names for the analog pins but as soon as I tried the slightly modified sketch in processing with firmata the error message appears that certain pins are out of bound.
Arduino NANO and Firmata - Analog Pin NumbersDear community, I need to address all pins (digital and analog) of my Arduino NANO via Firmata. My Arduino Sketch is one for multiple circuits (educational purpose) and I changed all the Axxx-pins in the .pde-Sketch (see below) according to the pin map A0=14, A1=15 etc. but I got an error message for pin 18 (out of range) and I don't know how to address A6 and A7 because there are no digital numbers in the pin map for them. I tried to just use the numbers without A (A2=2 ...) but this doesn't work for me because there are conflicts with the digital pins and the use of same pin numbers. Can anyone help me how to address ALL pins by numbers? And: do I have to change the StandardFirmata to use it for the NANO and to use all the pins? Thanks in advance. KLI
import processing.serial.*; import cc.arduino.*; Arduino arduino; //Arduino.INPUTs: int AND_1a = 14; int AND_1b = 15; int XOR_a = 16; int XOR_b = 17; int AND_2a = 18; int AND_2b = 19; int NOT_In = 6; int Poti = 7; int OR_a = 2; int OR_b = 7; //Arduino.OUTPUTs: int AND_1 = 4; int XOR = 5; int Tank_Anzeige = 6; int Schwell_030 = 3; int Schwell_50100 = 8; int Schwell_70100 = 9; int Schwell_020 = 10; int AND_2 = 11; int NOT = 12; int OR = 13; //Variablen: int PotiWert = 0; int Summer_Intervall = 500; //Summer an Pin 7 int Status = Arduino.LOW; double Warten; void setup() { //Arduino.INPUTs: arduino = new Arduino(this, Arduino.list()[0], 57600); arduino.pinMode (AND_1a, Arduino.INPUT); arduino.pinMode (AND_1b, Arduino.INPUT); arduino.pinMode (XOR_a, Arduino.INPUT); arduino.pinMode (XOR_b, Arduino.INPUT); arduino.pinMode (AND_2a, Arduino.INPUT); arduino.pinMode (AND_2b, Arduino.INPUT); arduino.pinMode (NOT_In, Arduino.INPUT); arduino.pinMode (Poti, Arduino.INPUT); arduino.pinMode (OR_a, Arduino.INPUT); arduino.pinMode (OR_b, Arduino.INPUT); //Arduino.OUTPUTs: arduino.pinMode (AND_1, Arduino.OUTPUT); arduino.pinMode (XOR, Arduino.OUTPUT); arduino.pinMode (Tank_Anzeige, Arduino.OUTPUT); arduino.pinMode (Schwell_030, Arduino.OUTPUT); arduino.pinMode (Schwell_50100, Arduino.OUTPUT); arduino.pinMode (Schwell_70100, Arduino.OUTPUT); arduino.pinMode (Schwell_020, Arduino.OUTPUT); arduino.pinMode (AND_2, Arduino.OUTPUT); arduino.pinMode (NOT, Arduino.OUTPUT); arduino.pinMode (OR, Arduino.OUTPUT); Warten = millis(); } void draw() { //alle Logikgatter: //NOT: if (arduino.analogRead (NOT_In) > 1000) { arduino.digitalWrite (NOT, Arduino.LOW); } else { arduino.digitalWrite (NOT, Arduino.HIGH); } //OR: if (arduino.digitalRead (OR_a) == 1 || arduino.digitalRead (OR_b) == 1) { arduino.digitalWrite (OR, Arduino.HIGH); } else { arduino.digitalWrite (OR, Arduino.LOW); } //AND_1: if (arduino.analogRead (AND_1a) > 1000 && arduino.analogRead (AND_1b) > 1000) { arduino.digitalWrite (AND_1, Arduino.HIGH); } else { arduino.digitalWrite (AND_1, Arduino.LOW); } //AND_2: if (arduino.analogRead (AND_2a) > 1000 && arduino.analogRead (AND_2b) > 1000) { arduino.digitalWrite (AND_2, Arduino.HIGH); } else { arduino.digitalWrite (AND_2, Arduino.LOW); } //XOR: if ((arduino.analogRead(XOR_a) > 1000 && arduino.analogRead(XOR_b) < 1000) || (arduino.analogRead(XOR_a) < 1000 && arduino.analogRead(XOR_b) > 1000) ) { arduino.digitalWrite (XOR, Arduino.HIGH); } else { arduino.digitalWrite (XOR, Arduino.LOW); } //Poti-Auswertung: PotiWert = arduino.analogRead(Poti); //Schwellenwert-Schalter 0...30% if (PotiWert < 200) { arduino.digitalWrite (Schwell_030, Arduino.HIGH); } else { arduino.digitalWrite (Schwell_030, Arduino.LOW); } //Schwellenwert-Schalter 50...100% if (PotiWert > 511) { arduino.digitalWrite (Schwell_50100, Arduino.HIGH); } else { arduino.digitalWrite (Schwell_50100, Arduino.LOW); } //Schwellenwert-Schalter 70...100% if (PotiWert > 700) { arduino.digitalWrite (Schwell_70100, Arduino.HIGH); } else { arduino.digitalWrite (Schwell_70100, Arduino.LOW); } //Tankanzeige: dunkler werdende LED - PotiWert = hoch -> LED = hell arduino.analogWrite (Tank_Anzeige, (PotiWert / 4)); if (PotiWert < 100) { arduino.digitalWrite (Tank_Anzeige, Arduino.LOW); } //Tankanzeige: frequentierter Ausgang if (PotiWert < 100) { if ((millis() - Warten) > Summer_Intervall) { Warten = millis(); if(Status==Arduino.LOW){ Status=Arduino.HIGH;} else { Status=Arduino.LOW;} arduino.digitalWrite (Schwell_020, Status); } } else { arduino.digitalWrite (Schwell_020, Arduino.LOW); } }_Read Potentiometer/Serial from Arduino on processing@jeremydouglass since you have helped me very well, could you perhaps help me a little more? Because now I have to add a switch (button) to this programm. If you push the button the ellips has to turn green and else the button is just white.
for Arduino code I used the StandarFirmata file which can be found in arduino. I read somewhere that was necessary.
for proccesing code I have this
    import org.firmata.*;

    import processing.serial.*;
    import cc.arduino.*;

    Arduino arduino;


     int buttonPin = 2;

    Serial myPort;

    PFont myFont;
    float val;
    int[] pin_val;
    int lf = 10;
    boolean received;
    float inByte = 0;
    int buttonState = 0;

    void setup() {
      size(325,400);
       myFont = createFont("Arial", 18);
     textFont(myFont, 18);

     /*println(Serial.list());*/

     myPort = new Serial (this, Serial.list()[0], 9600);
     pin_val = new int[0];
     val = 0;
     received = false;
      arduino = new Arduino(this, Arduino.list()[0], 57600);
      arduino.pinMode(buttonPin, Arduino.INPUT);

    }

    void draw() {

      fill(51,153,255);
      rect(10,10,300,150);
      textSize(30);
      fill(0,0,0);
      textAlign(CENTER);
      textFont(myFont, 18);

      text("received:  " +inByte*2.5575, 160,50 );

     }


    /* fill(255,255,255);
      ellipse(162.5,260,80,80);*/


    void serialEvent (Serial myPort) {
         String inString = myPort.readStringUntil('\n');
          if (inString != null) {
          // trim off any whitespace:
          inString = trim(inString);
          // convert to an int and map to the screen height:
          inByte = float(inString);
          println(inByte);
          inByte = map(inByte, 0, 1023, 0, height);}
        }


    void arduinoEvent(Arduino arduino){ //I believe this is not entirely correct either

     if (arduino.digitalRead(buttonPin) == Arduino.LOW)  {
          fill(255,255,255);
      ellipse(162.5,260,80,80);
     }
     else {
          fill(0,255,0);
        ellipse(162.5,260,80,80);
      }
    }
The program won't run because it says the port is busy, I get that because at the top I connected 'Arduino' also to port 0. But I dont know how to do it otherwise, since both my button and my potmeter are connected to that port.
action after button pressed for 10 secondshi!
I need some help using arduino and processing. i want to make a 3 page program, one start page, one processing page, and one accepted page. I found out with some help how to do it in processing alone using void keyPressed, but i cant figure out how to do it while a button is pressed on my breadboard. if the button is pressed you get the processing page for 10 seconds and the LED on my breadboard should fade. after 10 seconds the "success" page should come up and the led turns off.
import processing.serial.*; import cc.arduino.*; import org.firmata.*; Arduino arduino; int led = 9; int buttonState = 10; int fadeAmount = 8; int opacity = 255; int circleSize = 75; int circleYpos = 700; int circleXpos = 700; int timer=0; int count = 10; int trigger = 0; int brightness = 0; boolean activateCircle=false; void setup() { arduino= new Arduino ( this, "COM3", 57600); arduino.pinMode ( led, Arduino.OUTPUT); arduino.pinMode ( buttonState, Arduino.INPUT); size(800, 800); smooth(); background(250); textAlign(CENTER); rectMode(CENTER); stroke(0); } void draw() { if (activateCircle == true) { processing(); if ( (millis()-timer) > 10000 ) { circle_off(); } } else { startPage(); } } void loop() { if (arduino.digitalRead(buttonState) == Arduino.HIGH) { activateCircle=true; timer = millis(); } } void startPage() { background(250); stroke(0); fill(255, 2, 2); ellipse(width/2, 600, circleSize + 10, circleSize+10); ellipse(200, 600, circleSize + 10, circleSize+10); ellipse(600, 600, circleSize + 10, circleSize+10); fill(0); textSize(50); text("Start", width/2, 200); textSize(30); text("Touch the ball to accept the terms of agreement", width/2, height/2 + 50); arduino.analogWrite(led, Arduino.LOW); } void processing() { background(250); textSize(15); fill(0, opacity); text("Sending information", 700, 650); fill(255, 2, 2, opacity); noStroke(); ellipse(circleXpos, circleYpos, circleSize, circleSize); if ((opacity <0) || (opacity >255)) opacity = 255; opacity -= fadeAmount; fill(250, 2, 2); rect(width/2, 235, 600, 100); fill(0); textSize(30); text("They know who your friends are", 400, 100); textSize(40); text("Hold your hand on the ball", width/2, 250); textSize(25); text("They know where you are", 300, 400); textSize(20); text("They know your interests", 500, 500); textSize(42); text("Do you agree with this?", width/2- 30, 715); arduino.analogWrite(led, brightness); brightness = brightness + fadeAmount; if (brightness <=0 || brightness >= 255) { fadeAmount = -fadeAmount; } delay(30); } void circle_off() { background(250); fill(0); textSize(50); text("Agreement success!", width/2, 720); fill(250); noStroke(); ellipse(circleXpos, circleYpos, circleSize, circleSize); arduino.analogWrite(led, Arduino.LOW); }Serial library with Processing.pyJust for the record... Firmata is working great on Processing Python Mode, you can find an example here: https://github.com/jdf/processing.py/tree/master/mode/examples/Contributed Libraries in Python/Arduino-Firmata
Need Help With Pan/Tilt Facetracking with servos and ArduinoHello, my project intention is to track a face with OpenCV/Processing and try and center your face with two servos controlles by an arduino. I can confirm that communication between Processing and Arduino does work, my problem is that, suddenly when i run the processing sketch, there is no incoming video although a couple of hours ago it was working. I am using Processing 3.3.5 and Arduino 1.8.2. Also, i'd like to use Firmata as serial does not appear to work for me. I'd also like to add i am not too experienced with Processing nor Arduino.
[Code below]
Thank you in advance.
Error with streaming from ArduinoSetup is not a good place to do this operations as this function runs only once.
The serialEvent() is a callBack function that gets executed every time data arrives via serial. It is there where you handle the data. However, it is advised not to work in your sketch in that function. Any draw operation needs to be done in the drawing thread which you own and you can access via draw(): https://processing.org/reference/draw_.html
Here is my attempt on your code. Since I don't have an arduino, I have disabled about 5 lines in your code. For your code to work with your arduino, you need to adjust the min/max range to 25/30 and enable those 5 lines related to arduino and serial event. Or you can run the code as it is. I use key events to simulate your arduino's input data. For the code to work, you need to set your min/max to 0/9 and type 16 times to fill the array. as soon as the array is full, it populates the second and bigger table array using a modify version of your makeArray. I believe there is some work still to be done in your heat map code. You might need to create a separate post to address this issue.
Kf
//import cc.arduino.*; // ## ENABLE/DISABLE for serial operation ON/OFF //import org.firmata.*; // ## ENABLE/DISABLE for serial operation ON/OFF //import apsync.*; // ## ENABLE/DISABLE for serial operation ON/OFF import processing.serial.*; final int N=16; final int MINVAL=0; //25; final int MAXVAL=9; //30; int ctr=0; boolean full=false; float[] data = new float[N]; float[][] interp_array; Serial myPort; // Create object from Serial class String val; // Data received from the serial port int lf = 10; void setup() { size(400, 400); // Set drawing mode to HSB instead of RGB colorMode(HSB, 1, 1, 1); //String portName = Serial.list()[2]; // myPort = new Serial(this, "COM3", 9600); // ## ENABLE/DISABLE for serial operation ON/OFF interp_array = new float[400][400]; } void draw() { if (full) { background(0); makeArray(); applyColor(); println("Execution completed!"); full=false; } } void keyReleased() { if (key>='0' && key<='9') { storeData((float)(key-'0')); } } void serialEvent(Serial port) { String dataStr = ""; // dataStr=myPort.readStringUntil(lf); // ## ENABLE/DISABLE for serial operation ON/OFF if (data!=null) { storeData(Float.parseFloat(dataStr)); } } void storeData(float val) { data[ctr++]=val; print(ctr + " "); if (ctr==N) { full=true; ctr=0; printMyData(); println("\nTrigger heat map execution... Please wait."); } } void printMyData() { println(); println(); for (int i=0; i<N; i++) { print(data[i]+"\t"); if ( (i+1)%4==0) println(); } } boolean isSpecialCell(int c){ return (c == 50 || c == 150 || c == 250 || c == 350); } // Fill array with Perlin noise (smooth random) values void makeArray() { int index=0; for (int r = 0; r < height; r++) { for (int c = 0; c < width; c++) { if (isSpecialCell(r) && isSpecialCell(c)) { interp_array[c][r]=data[index++]; } //else { //// Range is 24.8 - 30.8 //interp_array[c][r] = 24.8 + 6.0 * noise(r * 0.02, c * 0.02); //} } } for (int r = 0; r < height; r++) { for (int c = 0; c < width; c++) { int[] closest_r_array = {abs(50 - r), abs(150 - r), abs(250 - r), abs(350 - r)}; int[] closest_c_array = {abs(50 - c), abs(150 - c), abs(250 - c), abs(350 - c)}; int closest_r = min(closest_r_array); int closest_c = min(closest_c_array); if (!isSpecialCell(r) && !isSpecialCell(c)) { interp_array[c][r] = lerp(closest_r, closest_c, 0.5); } } } } void applyColor() { // Generate the heat map pushStyle(); // Save current drawing style loadPixels(); int p = 0; for (int r = 0; r < height; r++) { for (int c = 0; c < width; c++) { // Get the heat map value float value = interp_array[c][r]; // Constrain value to acceptable range. value = constrain(value, MINVAL, MAXVAL); // Map the value to the hue // 0.2 blue // 1.0 red value = map(value, MINVAL, MAXVAL, 0.2, 1.0); pixels[p++] = color(value, 0.9, 1); } } updatePixels(); popStyle(); // Restore original drawing style }Error with streaming from ArduinoHey everyone! I'm using this code that I saw from another post somewhere in this forum and adapted it to generate a heat map using data from an arduino. However, for some reason whenever I try streaming data in order to create the heat map, I always get back an error of some kind because of the data streaming. I'm specifically asking about lines 25 and 26 which is where the error happens. I think it might be because of some index out of bounds exception but I do not understand the library enough.
import cc.arduino.*; import org.firmata.*; import apsync.*; import processing.serial.*; float[][] interp_array; Serial myPort; // Create object from Serial class String val; // Data received from the serial port int lf = 10; void setup() { //String portName = Serial.list()[2]; myPort = new Serial(this, "COM3", 9600); size(400, 400); interp_array = new float[400][400]; makeArray(); applyColor(); } // Fill array with Perlin noise (smooth random) values void makeArray() { for (int r = 0; r < height; r++) { for (int c = 0; c < width; c++) { if ((r == 50 || r == 150 || r == 250 || r == 350) && (c == 50 || c == 150 || c == 250 || c == 350)) { String data = myPort.readStringUntil(lf); interp_array[c][r] = Float.parseFloat(data); } //else { //// Range is 24.8 - 30.8 //interp_array[c][r] = 24.8 + 6.0 * noise(r * 0.02, c * 0.02); //} } } for (int r = 0; r < height; r++) { for (int c = 0; c < width; c++) { int[] closest_r_array = {abs(50 - r), abs(150 - r), abs(250 - r), abs(350 - r)}; int[] closest_c_array = {abs(50 - c), abs(150 - c), abs(250 - c), abs(350 - c)}; int closest_r = min(closest_r_array); int closest_c = min(closest_c_array); if (!(r == 50 || r == 150 || r == 250 || r == 350) && !(c == 50 || c == 150 || c == 250 || c == 350)) { interp_array[c][r] = lerp(closest_r, closest_c, 0.5); } } } } void applyColor() { // Generate the heat map pushStyle(); // Save current drawing style // Set drawing mode to HSB instead of RGB colorMode(HSB, 1, 1, 1); loadPixels(); int p = 0; for (int r = 0; r < height; r++) { for (int c = 0; c < width; c++) { // Get the heat map value float value = interp_array[c][r]; // Constrain value to acceptable range. value = constrain(value, 25, 30); // Map the value to the hue // 0.2 blue // 1.0 red value = map(value, 25, 30, 0.2, 1.0); pixels[p++] = color(value, 0.9, 1); } } updatePixels(); popStyle(); // Restore original drawing style }NODE Festival 2017Every two years or so the NODE festival attracts artists and developers (and everything in between) to Frankfurt to spend an exciting week together. Here is what they've sent to invite you:
Dear Processing community,
we warmly invite you to NODE17 Forum for Digital Arts taking place from June 26th to July 2nd 2017 in Frankfurt, Germany.
Join the one-week festival program with more than 50 hands-on workshops on creative coding addressing students, artists and designers. Our 65+ international hosts are looking forward to share their knowledge and experience.
The content of teaching focuses on the community driven visual toolkit vvvv but reaches out to many other great programs and tools.
Also see the last festival edition for some inspiration or watch the video documentary.
For NODE17 we especially recommend the following classes:
––– BEGINNERS & STUDENTS –––
Introduction to interactive media installations and generative art with vvvv for beginners

3D Basics and Interaction with Kinect
––– INTERACTION –––
Introduction to Virtual Reality with HTC Vive

Introduction to Skeleton Tracking and Pointcloud Interaction with Kinect v2

––– GRAPHICS RENDERING –––
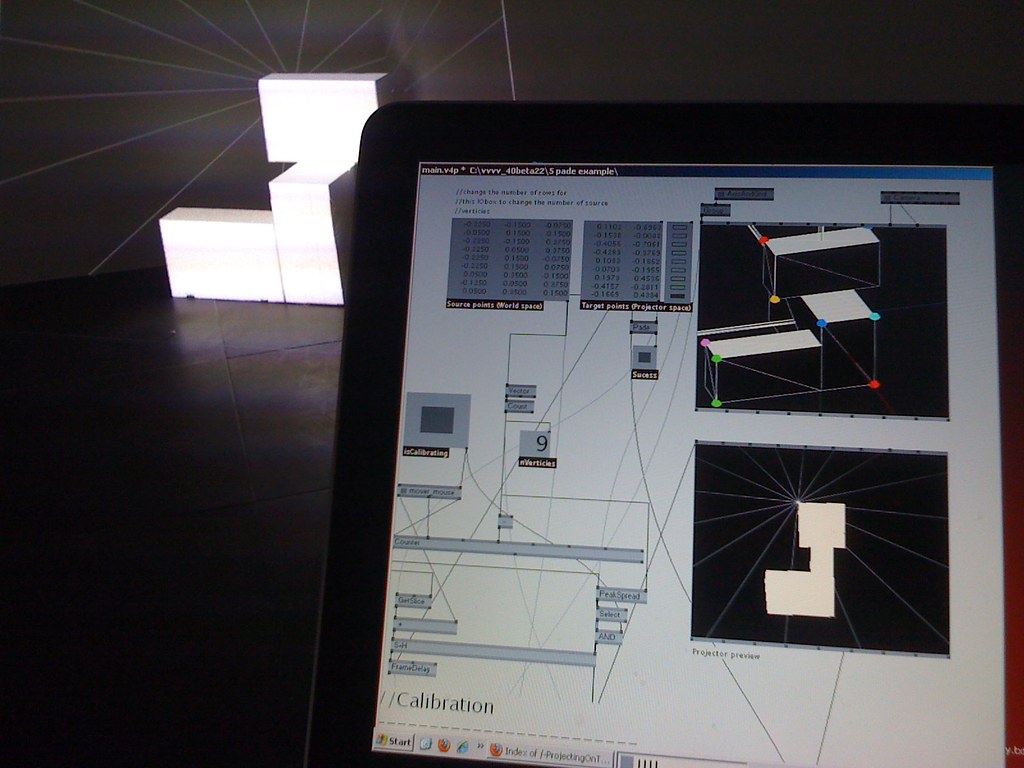
Projection Mapping – The world is our canvas
Introduction to DirectX 11 Graphics Rendering

Particle System – A feature-rich, modular DirectX11 GPU enabled library

Supershiny motion graphics with superphong

DirectX11 Rendering and Shaders (Intermediate)

DirectX11 Rendering and Shaders (Expert)

Deform Objects by Points and Edges

––– HARDWARE & IO –––
Interfacing Arduino and vvvv – Introduction to Physical Computing

Internet of Things – Bridging the gap between machines with MQTT

Real-time Ceramics 3d printing

Furthermore we provide an open hackspace with a fab lab area and hardware rental corner.
You can also do your own program by participating in our bottom-up format Unconferenced or at the cozy Patcher Kucha Talks.
Get your festival tickets here.
Lovvvve Your NODE team
Maxbotix with Arduino: Inaccurate readingsI changed the code as follows to connect with Arduino using Firmata, and it is working now.
import cc.arduino.*;
import org.firmata.*;

import processing.video.*;
import processing.sound.*;
import processing.serial.*;

//Media variables
SoundFile DS1, DS2;
Arduino arduino;

//Sound/Image
float picAlpha = 0;
float vol = 0;
int val;

void setup() {
  fullScreen();

  //image
  bg = loadImage("Sonja.jpg");
  sonja = loadImage("Sonja_2.png");
  mom = loadImage("Mom.png");
  sorted = mom;

  //video
  YW = new Movie(this, "YW_1sm.mp4");
  YW.loop();

  //sound
  DS1 = new SoundFile(this, "DigitalStorge_1a.mp3");
  DS1.loop();
  DS1.amp(.75);
  DS2 = new SoundFile(this, "DigitalStorge_2a.mp3");
  DS2.loop();

  //sensor
  println(Arduino.list());
  arduino = new Arduino(this, "/dev/cu.usbmodem1421", 57600);
  arduino.pinMode(0, Arduino.INPUT);
}

void draw() {
  noCursor();

  //sensor
  //val = port.readStringUntil('\n');
  val = arduino.analogRead(0);
  print(val);
  print("in");
  println();

  //Interaction
  picAlpha = map(val, 80, 12, 0, 225);
  vol = map(val, 80, 0, 0, 1.0);
  glitchX = round(map(val, 24, 0, 410, 900));
  glitchY = round(map(val, 24, 0, 150, 750));

  //Sound
  DS2.amp(vol);
However, the volume of one of the soundtracks is supposed to change in relation to movement sensor (DS2), but instead it just plays at the same volume the whole time. Also, I receive this message: "ERROR: /node/free: Cannot free root node 0." I changed the files from stereo to mono, but I still receive this message.
When button clicked, let something moveSo my understanding is that if you use firmata, then you should be interacting with your arduino exclusively from Processing. I don't understand how you can be changing the LED from your arduino code if you have loaded the firmata in your arduino device.
I suggest following the firmata example provided in the previous post: https://adestefawp.wordpress.com/learning/using-arduino-firmata-and-processing-together/
Kf
When button clicked, let something moveI do use firmata, and still it doesn't move when i click BUTTON1
When button clicked, let something moveIs this your first sketch interacting with an arduino unit or have you done it before?
Are you using firmata? If so, this post could help: https://forum.processing.org/two/discussion/20955/arduino-not-being-reset-when-running-a-processing-sketch/p1
AND https://adestefawp.wordpress.com/learning/using-arduino-firmata-and-processing-together/Otherwise, you could use the following examples, reading the bytes directly from the serial port. Remark: If you loaded the firmata code into your arduino, you should stick to the above comment.
https://forum.processing.org/two/discussion/16618/processing-with-arduino-void-serialevent#Item_5
https://forum.processing.org/two/discussion/14534/myport-available-always-0#Item_1Kf
Firmata wont read dataHello, I need a suggestion on how to debug the following issue. I've created an application in Processing, that uses the Firmata library to read data from an Arduino analog input. The Program is used on several MacBooks. I've tested the application on three different macbooks and it works perfectly on two of them. But when running the program on the third macbook, the incoming data from the analoginput doesn't make sense. The incoming data is static and dosn't relate logical to the sensor. If i plug the same Arduino and sensor into the to other computers it works perfectly.
For me it seems like the serial connection over the USBmodem is not able to read the data, however it connect perfectly. No errors are occurring from the IDE. The non-working mac might not have java JDK installed but only the JSE. Could that have something to say?
Processing not reacting properly to arduino via firmataThis next is untested code.
Kf
import processing.serial.*;
import cc.arduino.*;
import org.firmata.*;
import processing.video.*;

final int STATEnull = -1;
final int STATE1=0;
final int STATE2=1;
final int STATE3=2;

int prevVal=-1;
int state=STATEnull;

Arduino arduino;
Movie oneDegree, twoDegrees, threeDegrees;

int sensorPin = 0;    // select the input pin for the potentiometer
int val;

void setup() {
  size(960, 540);
  arduino = new Arduino(this, Arduino.list()[3], 57600); //sets up arduino
  val = arduino.analogRead(sensorPin);

  oneDegree = new Movie(this, "comp1.mp4");
  twoDegrees = new Movie(this, "comp2.mp4");
  threeDegrees = new Movie(this, "comp3.mp4");
}


void draw() {
  val = arduino.analogRead(sensorPin);
  println(val);

  switch(state) {
  case STATE1:
    image(oneDegree, 0, 0);
    break;
  case STATE2:
    image(twoDegrees, 0, 0);
    break;
  case STATE3:
    image(threeDegrees, 0, 0);
    break;
  }

  if (state==STATE1 && oneDegree.time() == oneDegree.duration()) { //movie must be finished
    twoDegrees.play();
    state=STATE2;
  }
  if (state==STATE2 && twoDegrees.time() == twoDegrees.duration()) { //movie must be finished
    threeDegrees.play();
    state=STATE3;
  }

  //Only trigger video if there is a change in potentiometer
  if (prevVal==val){
    return;
  }
  else{
    prevVal=val;  //Update
  }

  if (val > 10 && val < 348) {
    oneDegree = new Movie(this, "comp1.mp4");
    oneDegree.play();
    state=STATE1;
  } else if (val > 348 && val < 686) {
    twoDegrees = new Movie(this, "comp2.mp4");
    twoDegrees.play();
    state=STATE2;
  } else if (val > 686 && val < 1024) {
    threeDegrees = new Movie(this, "comp3.mp4");
    threeDegrees.play();
    state=STATE3;
  } else {
    state=STATEnull;
  }
}

void movieEvent(Movie m) {
  m.read();
}