Howdy, Stranger!
We are about to switch to a new forum software. Until then we have removed the registration on this forum.
-
unable to install library
im using the latest processing .. and im a mac user im facing a few problems - my 'add library ' tool does not for (not for open kinect not for other libs) so wen i downloaded open kinect from github and copied it in the lib folder. - https://github.com/shiffman/OpenKinect-for-Processing/releases I receive a wide range of errors in different examples.
mostly kinect/kinect2 class does not exist .
im assuming the name of the downloaded lib could have some naming issue . or the updated library may have diff class names .. the existing names are like those mentioned in the documentation. can anyone suggest what should i do ?
p.s. the kinect lib were working fine before .. recently i deleted all the libraries to investigate why the 'add library' tool would not work .
How can I get sound to fade in and out depending on your location?Hello, I was able to make my sound play and stop with Kinect but it doesn't loop or fade out. I want my sound to continue playing with the video and just fade in if the interaction is activated and fade out when the interaction is no longer happening. Also, I want my sound to loop.
import processing.sound.*; import org.openkinect.processing.*; import processing.video.*; Movie vid; Movie vid1; SoundFile sound1; SoundFile sound2; Kinect2 kinect2; //PImage depthImg; //PImage img1; //pixel int minDepth=0; int maxDepth=4500; //4.5m boolean off = false; void setup() { size(1920,1080); //fullScreen(); vid = new Movie(this, "test_1.1.mp4"); vid1 = new Movie(this, "test_1.1.mp4"); sound1 = new SoundFile(this, "cosmos.mp3"); sound2 = new SoundFile(this, "NosajThing_Distance.mp3"); //MOVIE FILES //01.MOV //03.MOV //02.mov (File's too big) //Urban Streams.mp4 //HiddenNumbers_KarinaLopez.mov //test_w-sound.mp4 //test_1.1.mp4 //test005.mov //SOUND FILES //cosmos.mp3 //NosajThing_Distance.mp3 vid.loop(); vid1.loop(); kinect2 = new Kinect2(this); kinect2.initDepth(); kinect2.initDevice(); //depthImg = new PImage(kinect2.depthWidth, kinect2.depthHeight); //img1 = createImage(kinect2.depthWidth, kinect2.depthHeight, RGB); } void movieEvent(Movie vid){ vid.read(); vid1.read(); } void draw() { vid.loadPixels(); vid1.loadPixels(); //image(kinect2.getDepthImage(), 0, 0); int[] depth = kinect2.getRawDepth(); float sumX=0; float sumY=0; float totalPixels=0; for (int x = 0; x < kinect2.depthWidth; x++){ for (int y = 0; y < kinect2.depthHeight; y++){ int offset = x + y * kinect2.depthWidth; int d = depth[offset]; if ( d > 0 && d < 1000){ // //video.pixels[offset] = color(255, 100, 15); sumX +=x; sumY+=y; totalPixels++; brightness(0); } else { // //video.pixels[offset] = color(150, 250, 180); brightness(255); } } } vid.updatePixels(); vid1.updatePixels(); float avgX = sumX/totalPixels; float avgY=sumY/totalPixels; //VID 01 - Screen 01 if (avgX>300 && avgX<500){ tint(255, (avgX)/2); image(vid1, 1920/2, 0); if(sound2.isPlaying()==0){ sound2.play(0.5); sound2.amp(0.5); } }else{ tint(0, (avgX)/2); image(vid1, 1920/2, 0); if(sound2.isPlaying()==1){ delay(1); //IT DIMS THE VOLUME TO 0 BUT IT DOESN'T GO BACK TO VOLUME 0.5 [sound2.amp(0.5);] sound2.amp(0); } } //VID 02 - Screen 01 if (avgX>50 && avgX<200){ tint(255, (avgX)/3); image(vid, 0-(1920/2), 0); }else{ tint(0, (avgX)/3); image(vid, 0-(1920/2), 0); } }Kinect and .mov filesI'm having trouble controlling the .mov file's tint with rawdepth from kinect
import org.openkinect.processing.*; import processing.video.*; Movie video; Kinect2 kinect2; int minDepth=0; int maxDepth=4500; //4.5m void setup() { size(1920,1080); video = new Movie(this, "final-02.mov"); video.loop(); kinect2 = new Kinect2(this); kinect2.initDepth(); kinect2.initDevice(); } void movieEvent(Movie video){ video.read(); } void draw() { image(video, 0, 0); video.loadPixels(); int[] depth = kinect2.getRawDepth(); for (int x = 0; x < kinect2.depthWidth; x++){ for (int y = 0; y < kinect2.depthHeight; y++){ int offset = x + y * kinect2.depthWidth; int d = depth[offset]; if (d > 10 && d < 400){ //video.pixels[offset] = color(255, 100, 15); tint(10,255); } else { //video.pixels[offset] = color(150, 250, 180); tint(250,10); } } println(x); } video.updatePixels(); image(video,0,0); }Changing opacity of silhouettesWell, in your code you loop through the pixels here:
for (int x = 0; x < kinect2.depthWidth; x++) {
    for (int y = 0; y < kinect2.depthHeight; y++) {
...you could just loop through them like this to do the left half:
for (int x = 0; x < kinect2.depthWidth/2; x++) {
    for (int y = 0; y < kinect2.depthHeight; y++) {
...and then do the right half separately. Or the top and bottom -- just loop over different ranges.
does processing 3.3.5 support skeleton tracking via kinect?Totovr76, i am a beginner of processing, i have add the library, and using kinect2, but display as follow:
SimpleOpenNI Error: Can't open device: DeviceOpen using default: no devices found
SimpleOpenNI not initialised SimpleOpenNI not initialised
can you help me to fix it?
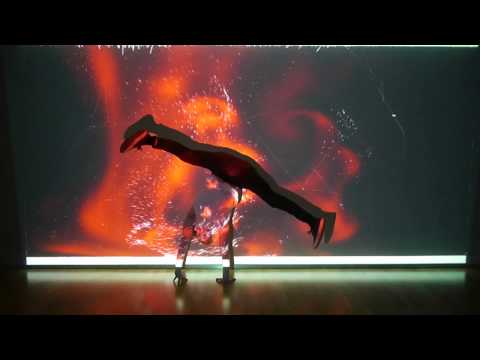
Changing opacity of silhouettesThank you guys for being so helpful. I decided to try using my laptop camera as a second camera and so I can install these separately. Then I played with the filter() to get some cool effects. What do you guys think? The whole idea is to create a place where people walk by and see others also through the mixing of their silhouettes.

import org.openkinect.processing.*; import processing.video.*; Kinect2 kinect2; Capture video; PImage img; void setup() { size(512, 424, P3D); kinect2 = new Kinect2(this); kinect2.initDepth(); kinect2.initDevice(); img = createImage(kinect2.depthWidth, kinect2.depthHeight, RGB); video = new Capture(this, 512, 424); video.start(); } void captureEvent(Capture video) { // Step 4. Read the image from the camera. video.read(); } void draw() { background(0); img.loadPixels(); noTint(); int[] depth = kinect2.getRawDepth(); for (int x = 0; x < kinect2.depthWidth; x++) { for (int y = 0; y < kinect2.depthHeight; y++) { int offset = x + y * kinect2.depthWidth; //offset is translating grid location to array int d = depth[offset]; if (d < 500) { img.pixels[offset] = color(255, 0, 0); } else if (d > 500 && d<1000) { img.pixels[offset] = color(0, 255, 0); } else if (d >1000 && d<1500) { img.pixels[offset] = color(0, 0, 255); } else { img.pixels[offset] = color(0); } } // if (d < 500) { // tint(255, 0, 0, 63); // img.pixels[offset] = color(255, 0, 0); // } else if (d > 500 && d<1000) { // img.pixels[offset] = color(0, 255, 0); // } else if (d >1000 && d<1500) { // img.pixels[offset] = color(0, 0, 255); // } else { // img.pixels[offset] = color(0); // } //} } img.updatePixels(); image(img, 0, 0); tint(255, 0, 0, 127); image(video, 0, 0); //filter(POSTERIZE, 4); filter(INVERT); }Changing opacity of silhouettes@jeremydouglass I added the tint and blend and tried changing the alpha attribute and all didn't work,
import org.openkinect.processing.*;
Kinect2 kinect2;

PImage img;
PImage img2;

void setup() {
  size(512, 424, P3D);
  kinect2 = new Kinect2(this);
  kinect2.initDepth();
  kinect2.initDevice();
  img = createImage(kinect2.depthWidth, kinect2.depthHeight, RGB);
  img2 = createImage(kinect2.depthWidth, kinect2.depthHeight, RGB);
}

void draw() {
  background(0);

  img.loadPixels();
  img2.loadPixels();

  int[] depth = kinect2.getRawDepth();
  for (int x = 0; x < kinect2.depthWidth; x++) {
    for (int y = 0; y < kinect2.depthHeight; y++) {
      int offset = x + y * kinect2.depthWidth; //offset is translating grid location to array
      int d = depth[offset];

      if (d < 500) {
**** tint(255,0,0,63)**** img.pixels[offset] = color(255, 0, 0); img2.pixels[offset] = color(255, 0, 0); } else if (d > 500 && d<1000) {
        img.pixels[offset] = color(0, 255, 0);
        img2.pixels[offset] = color(0, 255, 0);
      } else if (d >1000 && d<1500) {

        img.pixels[offset] = color(0, 0, 255);
        img2.pixels[offset] = color(0, 0, 255);
      } else {

        img.pixels[offset] = color(0);
        img2.pixels[offset] = color(0);
      }
    }
  }

  img.updatePixels();
  img2.updatePixels();

  image(img, 0, 0);
  image(img2,0,0);

  **blend(img, 0, 0, 514, 424, 0, 0, 514, 424, MULTIPLY);**
}
@kfrajer I tried before with PGraphics to blend a moving ellipse on mouseX and mouseY and another ellipse randomly placed and that worked well so I tried to use the same method to apply to this and now it's not working, perhaps it's because Kinect can only act as one input.
Changing opacity of silhouettesSo like here, I'm showing the kinect image twice as img and img2. But it fails to display the 2 images over each other like in PGraphics.
import org.openkinect.processing.*; Kinect2 kinect2; PImage img; PImage img2; void setup() { size(512, 424, P3D); kinect2 = new Kinect2(this); kinect2.initDepth(); kinect2.initDevice(); img = createImage(kinect2.depthWidth, kinect2.depthHeight, RGB); img2 = createImage(kinect2.depthWidth, kinect2.depthHeight, RGB); } void draw() { background(0); img.loadPixels(); img2.loadPixels(); int[] depth = kinect2.getRawDepth(); for (int x = 0; x < kinect2.depthWidth; x++) { for (int y = 0; y < kinect2.depthHeight; y++) { int offset = x + y * kinect2.depthWidth; //offset is translating grid location to array int d = depth[offset]; if (d < 500) { img.pixels[offset] = color(255, 0, 0); img2.pixels[offset] = color(255, 0, 0); } else if (d > 500 && d<1000) { img.pixels[offset] = color(0, 255, 0); img2.pixels[offset] = color(0, 255, 0); } else if (d >1000 && d<1500) { img.pixels[offset] = color(0, 0, 255); img2.pixels[offset] = color(0, 0, 255); } else { img.pixels[offset] = color(0); img2.pixels[offset] = color(0); } } } img.updatePixels(); img2.updatePixels(); image(img, 0, 0); image(img2,0,0); }Changing opacity of silhouettesHi, Using Daniel Shiffmana's MinMaxThreshold tutorial, I was able to change the colour from red to blue to green based on their distance to the Kinect. I would like to make a wall where when 2 people walk past each other, their silhouette colours mix. I tried to play with opacity with a background image but wouldn't mix 2 different silhouettes detected by kinect. Should I use blog detection to get the kinect to detect multiple people and how would I do this? I am using Kinect2 with Processing3 and seems like SimpleOpenNI doesn't work for Kinect2? Thanks!
Here's the code:
import org.openkinect.processing.*; // Kinect Library object Kinect2 kinect2; //float minThresh = 480; //float maxThresh = 830; PImage kin; PImage bg; void setup() { size(512, 424, P3D); kinect2 = new Kinect2(this); kinect2.initDepth(); kinect2.initDevice(); kin = createImage(kinect2.depthWidth, kinect2.depthHeight, RGB); bg = loadImage("1219690.jpg"); } void draw() { background(0); //loadPixels(); tint(255,254); image(bg,0,0); kin.loadPixels(); //minThresh = map(mouseX, 0, width, 0, 4500); //maxThresh = map(mouseY, 0, height, 0, 4500); // Get the raw depth as array of integers int[] depth = kinect2.getRawDepth(); //float sumX = 0; //float sumY = 0; //float totalPixels = 0; for (int x = 0; x < kinect2.depthWidth; x++) { for (int y = 0; y < kinect2.depthHeight; y++) { int offset = x + y * kinect2.depthWidth; int d = depth[offset]; //println(d); //delay (10); tint(255,127); if (d < 500) { kin.pixels[offset] = color(255, 0, 0); //sumX += x; //sumY += y; //totalPixels++; } else if (d > 500 && d<1000){ kin.pixels[offset] = color(0,255,0); } else if (d >1000 && d<1500){ kin.pixels[offset] = color(0,0,255); } else { kin.pixels[offset] = color(0); } } } kin.updatePixels(); image(kin, 0, 0); //float avgX = sumX / totalPixels; //float avgY = sumY / totalPixels; //fill(150,0,255); //ellipse(avgX, avgY, 64, 64); //fill(255); //textSize(32); //text(minThresh + " " + maxThresh, 10, 64); } Each frame stored and fading out in the draw()
Thanks so much really, today I adapted the entire thing to Kinect2 working with Macs as well.. Will upload it to github soon.
Aha, what a coincidence really, it's like I sent the code yesterday! Or it is just zeitgeist :)
Each frame stored and fading out in the draw()Thanks so much for the answer, I pretty much get the idea and it's seems brilliant! But, sadly, when it came to implementing this to the code I found I failed...
Here is my draw function;
void draw() {

    fluidSolver.update();
    for (int i=0; i<fluidSolver.getNumCells(); i++) {
      int d = 2;
      imgFluid.pixels[i] = color(fluidSolver.r[i] * d, fluidSolver.g[i] * d, fluidSolver.b[i] * d);

  }

    imgFluid.updatePixels();
    image(imgFluid, 0, 0, width, height);
    particleSystem.updateAndDraw();

}
From your sketch I see (if I'm correct!), these are the lines that makes the trick but I couldn't find where to insert this in my draw function - or would I have to make additional things in setup or anywhere as well?
 fill(0);
 fill(0,0,0,10);
 rect(0,0,mouseX,height);
 rect(mouseX,0,width,height);
Thanks so much again really, it's almost New Year here and I'm still obsessing over this! Have a nice year by the way :-)
Best wishes.
PS: I can also send you the sketch file if you like, it's a bit long to paste here actually. I have implemented this fantastic yet very old sketch called MSAFluid by memo akten for Processing 3, it used to rely on old deprecated libraries like javax.media. Though, even though this would not run without the actual code (it's on another tab in my sketch) here is the main thing that makes it work.
PImage imgK; PShader blur; PImage img; ArrayList<PVector> trail = new ArrayList<PVector>(); static float sizex; static float sizey; final float FLUID_WIDTH = 32; final static int maxParticles = 500; static int w; static int h; float invWidth, invHeight; // inverse of screen dimensions float aspectRatio, aspectRatio2; MSAFluidSolver2D fluidSolver; ParticleSystem particleSystem; PImage imgFluid; boolean untouched=true; public void setup() { background(0); size(512, 424); kinect2 = new Kinect2(this); kinect2.initDepth(); kinect2.initDevice(); img = createImage(kinect2.depthWidth, kinect2.depthHeight, RGB); w=width; h=height; textAlign(CENTER, CENTER); invWidth = 1.0f/width; invHeight = 1.0f/height; aspectRatio = width * invHeight; aspectRatio2 = aspectRatio * aspectRatio; fluidSolver = new MSAFluidSolver2D((int)(FLUID_WIDTH), (int)(FLUID_WIDTH * height/width)); fluidSolver.enableRGB(true).setFadeSpeed(0.003f).setDeltaT(0.5f).setVisc(0.0001f); imgFluid = createImage(fluidSolver.getWidth(), fluidSolver.getHeight(), ARGB); particleSystem = new ParticleSystem(); } public void mouseMoved() { untouched=false; float mouseNormX = mouseX * invWidth; float mouseNormY = mouseY * invHeight; float mouseVelX = (mouseX - pmouseX) * invWidth; float mouseVelY = (mouseY - pmouseY) * invHeight; addForce(mouseNormX, mouseNormY, mouseVelX, mouseVelY); } void draw() { noStroke(); fill(0); rect(0,0,mouseX,height); fill(0,0,0,10); rect(mouseX,0,width,height); fluidSolver.update(); for (int i=0; i<fluidSolver.getNumCells(); i++) { int d = 2; imgFluid.pixels[i] = color(fluidSolver.r[i] * d, fluidSolver.g[i] * d, fluidSolver.b[i] * d); } imgFluid.updatePixels(); image(imgFluid, 0, 0, width, height); particleSystem.updateAndDraw(); } // add force and dye to fluid, and create particles public void addForce(float x, float y, float dx, float dy) { float speed = dx * dx + dy * dy * aspectRatio2; // balance the x and y components of speed with the screen aspect ratio if (speed > -0.1) { if (x<0) x = 0; else if (x>1) x = 0.1; if (y<0) y = 0; else if (y>1) y = 0.1; float colorMult = 0; float velocityMult = 10.0f; int index = fluidSolver.getIndexForNormalizedPosition(x, y); int drawColor; colorMode(HSB, 360, 1, 1); float hue = ((x + y) * 180 + frameCount) % 360; drawColor = color(hue, 1, 1); colorMode(RGB, 1); fluidSolver.rOld[index] += red(drawColor) * colorMult; fluidSolver.gOld[index] += green(drawColor) * colorMult; fluidSolver.bOld[index] += blue(drawColor) * colorMult; particleSystem.addParticles(x * width, y * height, 10); fluidSolver.uOld[index] += dx * velocityMult; fluidSolver.vOld[index] += dy * velocityMult; } } class Particle { final static float MOMENTUM = 0.3f; final static float FLUID_FORCE = 0.3f; float x, y; float vx, vy; float radius; // particle's size float alpha; float mass; float glow; public void init(float x, float y) { this.x = x; this.y = y; vx = 0.2; vy = 0.2; radius = 1; alpha = random(0.3f, 1); mass = random(0.1f, 1); } public void update() { // only update if particle is visible if (alpha == 0) return; // read fluid info and add to velocity int fluidIndex = fluidSolver.getIndexForNormalizedPosition(x * invWidth, y * invHeight); vx = fluidSolver.u[fluidIndex] * width * mass * FLUID_FORCE + vx * MOMENTUM; vy = fluidSolver.v[fluidIndex] * height * mass * FLUID_FORCE + vy * MOMENTUM; // update position x += vx; y += vy; // bounce of edges if (x<0) { x = 0; vx *= -1; } else if (x > width) { x = width; vx *= -1; } if (y<0) { y = 0; vy *= -1; } else if (y > height) { y = height; vy *= -1; } // hackish way to make particles glitter when the slow down a lot if (vx * vx + vy * vy < 1) { vx = random(-1, 1); vy = random(-1, 1); alpha = 0; mass = -10; } // fade out a bit (and kill if alpha == 0); alpha *= 0.999f; if (alpha < 0.01f) alpha = 0; } public void drawOldSchool() { strokeWeight(alpha*1.5f); stroke(alpha, alpha, alpha, alpha); fill( 0xee, 0xee, 0xff, 50); //trail.add(new PVector(x + 1, y + 1)); //for(PVector p : trail){ line(x-vx, y-vy, x, y); } } class ParticleSystem { int curIndex; Particle[] particles; ParticleSystem() { particles = new Particle[maxParticles]; for (int i=0; i<maxParticles; i++) particles[i] = new Particle(); curIndex = 0; } public void updateAndDraw() { for (int i=0; i<maxParticles; i++) { if (particles[i].alpha > 0) { particles[i].update(); particles[i].drawOldSchool(); // use oldschool renderng } } } public void addParticles(float x, float y, int count ) { for (int i=0; i<count; i++) addParticle(x + random(-15, 15), y + random(-15, 15)); } public void addParticle(float x, float y) { particles[curIndex].init(x, y); curIndex++; if (curIndex >= maxParticles) curIndex = 0; } }Combining the MSAFluid with DepthPointCloud (Kinect2 / Mac)Hello,
Hello, first post here! I have a rather complicated question it seems. Basically I'm trying to combine MSAFluid sketch and the OpenKinect's DepthPointCloud sketch so that each vertex there will be a emitter of MSAFluid.
I've seen examples like this
 which were done with previous libraries and kinect versions - so, now I really want to accomplish this with my Kinect2 and on Processing 3 on my Mac.
You can see the js version of MSAFluid here, also the code is there; https://www.openprocessing.org/sketch/95408
And the DepthPointCloud code; https://github.com/shiffman/OpenKinect-for-Processing/tree/master/OpenKinect-Processing/examples/Kinect_v2/DepthPointCloud2
Already, thank you for trying to help out! I've seen many posts about this but they are all very old and not helpful in this situation. I really think I can move forward with a little guidance.
The solution seems pretty basic actually. Just replace the;
// Draw a point
vertex(point.x, point.y, point.z);
in the draw function (line 82) with the particlesystem (from the MSAFluid) so it would create an emitter where there is a vertex and it should work. Doesn't it? Though, I have tried this and it didn't work, maybe did it the wrong way, not sure. The problem I guess is that once I move in front of the camera vertex doesn't move unlike the mouse, it just shows another vertex which already is there but not displayed, is this logic correct? I mean how can manage this like shown on the video above, I just want each vertex created in the for loop to emit this fluid particles in the force of my movement.
Many thanks!
Hey Every1, I Need Help With a Kinect V1 Code On Raw Depth Data. Which Syntax's Are Incorrect?Check this code PointCloud I already run it, just change the objet Kinect2 for Kinect.
Can I apply ripple effect to KinectHi everyone, I'm trying to put some ripple effects to Kinect video. I found a ripple code online and tried it on a still image, it works. However,`` when I put it together with Kinect, there's no ripple at all-suppose to have the ripple effect when I drag the mouse. There's no error shown when I run the code. Can anyone help me on this? Thank you!
// A simple ripple effect. Click on the image to produce a ripple // Author: radio79 // Code adapted from http://www.neilwallis.com/java/water.html import org.openkinect.processing.*; Kinect2 kinect2; PImage img; Ripple ripple; void setup() { size(1920, 1080); kinect2 = new Kinect2(this); kinect2.initVideo(); kinect2.initDevice(); img = new PImage(kinect2.colorWidth, kinect2.colorHeight); ripple = new Ripple(); //frameRate(60); } void draw() { image(kinect2.getVideoImage(), 0, 0); img.loadPixels(); for (int loc = 0; loc < kinect2.colorWidth * kinect2.colorHeight; loc++) { img.pixels[loc] = ripple.col[loc]; } img.updatePixels(); ripple.newframe(); } class Ripple { int i, a, b; int oldind, newind, mapind; short ripplemap[]; // the height map int col[]; // the actual pixels int riprad; int rwidth, rheight; int ttexture[]; int ssize; Ripple() { // constructor riprad = 3; rwidth = width >> 1; rheight = height >> 1; ssize = width * (height + 2) * 2; ripplemap = new short[ssize]; col = new int[width * height]; ttexture = new int[width * height]; oldind = width; newind = width * (height + 3); } void newframe() { // update the height map and the image i = oldind; oldind = newind; newind = i; i = 0; mapind = oldind; for (int y = 0; y < height; y++) { for (int x = 0; x < width; x++) { short data = (short)((ripplemap[mapind - width] + ripplemap[mapind + width] + ripplemap[mapind - 1] + ripplemap[mapind + 1]) >> 1); data -= ripplemap[newind + i]; data -= data >> 5; if (x == 0 || y == 0) // avoid the wraparound effect ripplemap[newind + i] = 0; else ripplemap[newind + i] = data; // where data = 0 then still, where data > 0 then wave data = (short)(1024 - data); // offsets a = ((x - rwidth) * data / 1024) + rwidth; b = ((y - rheight) * data / 1024) + rheight; //bounds check if (a >= width) a = width - 1; if (a < 0) a = 0; if (b >= height) b = height-1; if (b < 0) b=0; col[i] = img.pixels[a + (b * width)]; mapind++; i++; } } } } void mouseDragged() { for (int j = mouseY - ripple.riprad; j < mouseY + ripple.riprad; j++) { for (int k = mouseX - ripple.riprad; k < mouseX + ripple.riprad; k++) { if (j >= 0 && j < height && k>= 0 && k < width) { ripple.ripplemap[ripple.oldind + (j * width) + k] += 512; } } } }Kinect v2 for Xbox or for WindowsI can tell you that the kinect2 for xbox works really well with processing on Windows
Track color within a certain distance (Mix color tracking and depth?)Thanks, hoping others Kinect user can help!
Actually, I've come close to something working (more like a early prototype), but I'm stuck, trying to mix to things.
I've been adapting this example:
To display an crosshair for red color object (Eventually, there would be a crosshair for blue and green). But the example seem to only work with a webcam... I'm trying to use the color image from Kinect to do the same things, without any result.
Here the code so far:
import KinectPV2.*; import gab.opencv.*; import processing.video.*; import processing.sound.*; KinectPV2 kinect2; PImage img; PImage img2; float minThresh = 500; float maxThresh = 600; int posXSquareEng = 100; int posYSquareEng = 100; int posXSquareFr = 400; int posYSquareFr = 100; int widthSquare = 100; int heightSquare = 100; int imgWidth = 512; int imgHeight = 424; int PADim = (imgWidth)*(imgHeight); Capture macCam; float[] rednessArray = new float[PADim]; void setup() { size(512, 424); kinect2 = new KinectPV2(this); kinect2.enableColorImg(true); kinect2.enableDepthImg(true); kinectColor.enableColorImg(true); //Start Windows kinect2.init(); img = createImage(kinect2.WIDTHDepth, kinect2.HEIGHTDepth, RGB); } void draw() { background(0); img.loadPixels(); countEng = 0; img.updatePixels(); image(img, 0, 0); img2 = kinect2.getColorImage(); image(img2,0,0); noFill(); stroke(255); rect(posXSquareEng, posYSquareEng, widthSquare, heightSquare); rect(posXSquareFr, posYSquareFr, widthSquare, heightSquare); //camSetup(); int[] pixelArray = img2.pixels; // If I were using a normal webcam, it would be int[] pixelArray = macCam.pixels; rednessArray = populateRednessArray(pixelArray); rednessArray = clippers(rednessArray); int[] centroid = centroid(rednessArray); drawCrosshairs(centroid); rect(centroid[0]-(widthSquare/2), centroid[1]-(heightSquare/2), widthSquare, heightSquare); println(str(centroid[0]) + " " + str(centroid[1])); // windows int[] depth = kinect2.getRawDepthData(); for(int x = 0 ; x < kinect2.WIDTHDepth; x++){ for(int y = 0 ; y < kinect2.HEIGHTDepth; y++){ int offset = x + y * kinect2.WIDTHDepth; float d = depth[offset]; if(d > minThresh && d < maxThresh){ if((x < centroid[0] + widthSquare/2) && y < (centroid[1] + heightSquare/2) && x > centroid[0]-(widthSquare/2) && y > centroid[1]-(heightSquare/2) ){ println("Sould Paint"); img.pixels[offset] = color(0,0, 255); }else{ img.pixels[offset] = color(255, 0, 150); } } else { img.pixels[offset] = color(0); } } } } void camSetup(){ if(macCam.available()){ macCam.read(); } macCam.loadPixels(); //macCam.updatePixels(); //image(macCam,0,0); } float[] populateRednessArray(int[] pixelArray) { float[] rednessArray = new float[PADim]; for(int i=0;i<PADim;i++){ rednessArray[i] = redness(pixelArray[i]); } return rednessArray; } float[] clippers(float[] rednessArray){ float cutoff = 0.175; for(int i=0; i<PADim; i++){ if(rednessArray[i] > cutoff){ rednessArray[i] = 1; } else { rednessArray[i] = 0; } } return rednessArray; } int[] centroid(float[] clippedArray){ int[] centroid = new int[2]; int count = 1; int xCenter = 0; int yCenter = 0; int countCutoff = 100; for(int i=0; i<PADim; i++){ if(clippedArray[i] == 1){ count +=1; xCenter +=i%imgWidth; yCenter +=(i - i%imgWidth)/imgWidth; } } if(count > countCutoff){ centroid[0] = xCenter/count; centroid[1] = yCenter/count; } else { centroid[0] = 0; centroid[1] = 0; } return centroid; } void drawCrosshairs(int[] centroid){ int xPos = centroid[0]; int yPos = centroid[1]; stroke(255); line(xPos, 0, xPos, imgHeight); line(0,yPos, imgWidth, yPos); ellipseMode(RADIUS); noFill(); ellipse(xPos, yPos, 8,8); }Kinect v2 How to shorten the cable?On the Kinect2. It is great and there are nice libraries for it.
But that cable is so bad... Way too long and too many proprietary connectors. For installation work or tight spaces it is real bad. Anyone who has used one must've come to to a similar conclusion.
Has anyone seen, crafted, or heard of a good way to make it shorter or use less parts? Or even use more standard connectors?
Is there a developer edition that is easier to use?
It would be great to publish a way to do this since there doesn't seem to be one out there yet.
Registered Image from Kinect v2Hey everyone,
I have an issue regarding Open Kinect for Processing. The current project we are building consists of background removal using a kinect. For this purpose we use the RGB information for color substraction as well as the depth information. Due to registration issues between the RGB and depth images provided by the kinect, we need to consider the registered image provided by the kinect (i.e. kinect2.getRegisteredImage().get()). That's where we get stuck...
After 2 days searching around to understand how is the registration information stored in the PImage returned by the kinect, we are still stuck. We were expecting the registered image using RGB channels for RGB information and Alpha channel for the depth values, but from our tests, it is not the case (Alpha channel is always either 255 or 0). We couldn't find any documentation on that matter online...
My question is: do you have any information on how we could extract RGB and depth values from the registered PImage? Currently we can only extract RGB values from it....
Thanks a lot for your feedback!
Laurent
Urgent! Please Help!!! (windows 10 autoupdate woe)Thanks @Chrisir for the answer. I reinstalled all the libraries and yes, it is kinect2. The thing is, everything was working fine before the Windows 10 update (bootcamp), and after that I can't get any sketches with openkinect working.
Urgent! Please Help!!! (windows 10 autoupdate woe)Did you install the lib?
Sure it's kinect2 !?


